


How To Build a ChatGPT-like Web App
AI


Alexandre Vernotte
Published on 27.02.24
With Bun/Elysia/HTMX/UnoCSS
For quite some time, OpenAI was the sole API provider of large language models (LLMs) for many of us in Europe. It’s important to note that “a long time” is relative, especially considering how the emergence of LLMs has dramatically altered our perception of time. In reality, what I really meant was “for the past year”. However, since then, new players have joined the field, including Mistral, Perplexity, Anthropic, Cohere, and others.
If you’re working on a project or product that involves LLMs, selecting the appropriate provider and model can be a challenging task. At Smartesting, we develop AI-powered tools: such as Yest (Visual test design) and Lynqa (AI agent for manual test execution). We wanted to enable the entire company to easily compare the results obtained withdifferent prompts to different LLMs, commercial or open-source. We decided to create a web interface that allows our company to efficiently conduct these experiments. This is the starting point of the development that we share with you here.
The interface we discuss in the subsequent sections is available in a github repository.
Choosing the frameworks and languages
Initiating a side project from the ground up presents an excellent chance to get acquainted with the newest trends in web development and to experiment with emerging frameworks and technologies. While we will still be using Typescript, we will explore the new paradigms and frameworks that came out very recently.
Let’s review the ones we picked for this project before diving into the implementation.
Runtime: Bun
Bun positions itself as a comprehensive alternative to traditional runtimes like Node.js, Yarn, pnpm or Deno. It made headlines following its 1.0 release, promising significantly faster build and run times compared to its predecessors, especially Node.js. Its design philosophy addresses some of the common frustrations developers encounter in Node.js environments, typically ESM/Compatibility issues and all the quirks that derive from it (like suddenly getting a “.ts is an unknown extension” error because you’ve added a new dependency).
One of Bun’s key selling points is its all-in-one toolkit approach, which streamlines the development workflow by integrating functionalities typically handled by separate tools. This includes not only the runtime environment but also transpilers (tsc, babel), bundlers (esbuild, webpack), and testing libraries (jest, mocha). This significantly reduces the setup time and complexity associated with starting new projects, making Bun it a great choice for quick starting a project and having it run right away.
Also, Bun maintains compatibility with existing Node.js ecosystems through the use of the package.json file for managing dependencies and scripts, which unlike Deno for instance, will make node developers right at home (just replace “npm” with “bun” in your commands and essentially you are good to go!).
Backend: Elysia
It is sometimes hard to realize there are other web frameworks besides Express. For this project, we will be using Elysia, a new framework optimized for Bun and Typescript. Following the steps of Bun, It claims to be highly performant, 18 times faster than Express. This won’t matter much in our case but, still worth mentioning. Besides speed, the framework provides an end-to-end type safety feature, which unifies the type system between the backend and frontend through API access. TypeBox is used to validate incoming data.
Those familiar with Express will find Elysia’s syntax comfortable, as it uses a similar approach, albeit a bit simpler: set a route, associate it to a function, and whatever that function returns is sent back to the browser. It is worth noting that Elysia is a new framework and its long-term performance and reliability are yet to be determined. However, for this project, it offers an attractive set of features. It will allow us to easily define the few routes we need, and abstract all the backend framework logic needed to stream the LLM’s response right to the browser “à la chatGPT”.
Frontend: HTMX
Frameworks like React have become the standard for developing web applications for the past 15 years. They manage the state of the application and update the user interface in response to changes in that state. This is a structured way to build complex, interactive web pages, but it often requires a substantial amount of JavaScript to manage the various components and their interactions.
In contrast, HTMX is a lightweight library, not a comprehensive framework, that enables developers to create dynamic content without writing a single line of JavaScript. It achieves this through custom attributes within HTML elements that define how and when content should be updated. This approach allows for the swapping of HTML elements with new versions fetched from the server. With HTMX, you can specify the exact conditions under which an element should be updated, where the updated content should come from, and how it should be incorporated into the existing page. It is not exactly clear how the library would support large-scale applications nor how it is maintainable long term, but it definitely simplifies the process of adding interactivity to web pages, making it a desirable option for projects where the overhead of a full framework like React would be overkill.
Style: UnoCSS
We are going for utility-based CSS for styling, using UnoCSS. It is an atomic CSS engine that has most of its features as optional. It inherits many features from WindyCSS (UnoCSS was created from one of WindyCSS team’s members), for instance attributify mode (organizing the style of elements in custom html attributes, like “text”, “bg”,”border”, instead of a single “class” attribute). UnoCSS allows you to define utility rules, then group these rules into a preset. It comes with a default preset, which is a superset of popular utility-first css libraries such as Tailwind and Bootstrap.
It means you can mix utility classes from these frameworks. Attributify mode is another preset, and there are presets for fonts, pure CSS icons, etc. There are also many community presets that you can import. UnoCSS is configured via a config file in which you specify your custom rules and the existing presets you want to have available. Eventually, unoCSS will extract only the rules from those presets that you used to produce the final CSS.
Building the app
Implementing the backend
What we want for this version of the chat portal is for a single user to interact with one type of model. We won’t cover auth and database management in this blogpost: everytime the user loads the application, it should erase the conversation and start fresh.
The exact model type will be hardcoded in a variable.
Let’s initiate the project with the following commands:
Bash
bun create elysia llmchat
cd llmchat An index file have been created, containing one route to /:
const app = new Elysia().get(“/”, () => “Hello Elysia”).listen(3000);
The server is started with the following command:
Bash
bun dev
Browse to http://localhost:3000 and you should see the message “Hello Elysia”. Note that the server is in watch mode, meaning it will automatically refresh upon any change in the source files.
First, we need to modify the index route so that it serves our chat’s only page:
TypeScript
const indexPlugin = new Elysia()

    .get('/', () => {

       return Bun.file('views/index.html');

    })

const app = new Elysia()

  .use(indexPlugin)

.listen(3000);We leveraged Elysia’s plugin pattern to separate the definition of the index route to the actual starting of the server. We use “Bun.file” to directly return a file called “index. html”, that we should now create along with its directory called “views”, at the root of the project. For now, the index file does not contain much:
HTML
<html>
<head><title>LLM Chat</title></head>

  <body><h1>LLM Chat</h1></body>

</html>Next, let’s install OpenAI and Mistral libraries to easily communicate with their LLMs. However, make sure first that you have valid API keys for both providers.
Bash
bun add openai @mistralai/mistralaiWe can now create types to store the conversation with the LLM, instantiate the LLM clients we just installed, and modify the index route so that it creates an empty conversation:
TypeScript
type Message = {

    role: "system" | "user" | "assistant";

    content: string;

};

type Conversation = Message[];

const openai = new OpenAI({

    apiKey: Bun.env.OPENAI_API_KEY

})

const mistral = new MistralClient(Bun.env.MISTRALAI_API_KEY)

const systemMessage: Message = {

    role: 'system',

    message: "You are a helpful assistant, provide answers to the user's questions to the best of your ability. Refrain from inventing knowledge, people are counting on you. "

}

const indexPlugin = new Elysia()

    .state('conversation', [systemMessage] as Conversation)

    .get('/', ({store}) => {

        store.conversation = [systemMessage] as Conversation;

       return Bun.file('views/index.html');

})The Message type above is the standard format for sending conversations to both LLM providers. A conversation usually starts with a system prompt, whose purpose is to define the assistant’s behavior. Then it follows with a sequence of user/assistant exchanges. We have set up a very generic system prompt, you may find a curated list of more specific ones here.
Because we will need access to the conversation object in other routes, we have created a state variable conversation, which we can reset using Elysia context’s store, before serving the index.html file.
To allow for streaming the LLM’s response to the frontend, we will use SSEs (Server Sent Events). SSEs are like web sockets but unidirectional: the server emits events and the client listens to some or all of the events, and updates its state accordingly. We therefore need to create a route to allow the frontend to receive events. But first, we need to install the stream plugin as it is not included in the core package of Elysia:
Bash
bun add @elysiajs/stream
Then we can add the route:
TypeScript
const streamPlugin = new Elysia()

    .state('stream', new Stream<string>())

    .get('/chat/stream', ({set,store}) => {

        store.stream = new Stream<string>()

        return store.stream

})We created a new Elysia plugin, and defined a stream object as a state variable, accessible via Elysia context’s store in other routes. Similarly to the conversation, we will need that stream for when the user sends in a request. On the frontend, everytime we load the main page of the application, HTMX will automatically emit a request to the stream route in order to establish the SSE connection.
The last route is the chat route, which receives a message, transfers it to the model along with the existing conversation, then uses the stream from the previous route to transfer the LLM response to the frontend. Since we chose HTMX for frontend, it expects the server to return an HTML fragment: a div that contains the user’s message, and another div into which the LLM’s response will be streamed. We could simply return these two divs as a string, but it’s best practice to use templating instead, so let’s use JSX. We first need to install elysia’s HTML plugin:
Bash
bun add @elysiajs/htmlAnd add the following lines to our tsconfig:
JSON
{

 "compilerOptions": {

        //...

        "jsx": "react",

        "jsxFactory": "Html.createElement",

        "jsxFragmentFactory": "Html.Fragment"

    }

}Finally, we must change the extension of our index file to “tsx”, and make sure that the Elysia plugin we write for the chat route uses the html plugin.
TSX
const chatPlugin = new Elysia()

    .use(indexPlugin)

    .use(streamPlugin)

    .use(html())

    .derive(async () => {

        const llmMessageId = Date.now().toString()

        return { llmMessageId };

    })

    .onResponse(({ store, llmMessageId }) => {

streamOpenAIResponse(store.stream,store.conversation, llmMessageId).then(

    (llmMessage) => store.conversation.push(llmMessage)

)

    })

    .post('/chat', async ({ llmMessageId, store, set, body }) => {

        try {

            const userMessage: Message = { role: 'user', content: body.usermessage }

            store.conversation.push(userMessage)

            return <>

<div>{body.usermessage}</div>

            <div id={llmMessageId}></div>

</>

        } catch (error) {

            set['status'] = 500

            return 'An error occurred while processing your request.'

        }

    }, {

        body: t.Object({

            usermessage: t.String()

        })

})A lot is happening here. First we make the chatPlugin use the plugins we’ve created before, giving us access to their state variables, the stream and the ongoing conversation. Next we extend Elysia’s context with derive: like state, it allows us to create variables that will be available to subsequent routes in the plugin (by subsequent we mean routes that are defined literally after in the code). The difference is that derive assigns properties when each request happens.
We use it to generate an ID for the div into which we will stream the LLM’s response. For simplicity we take the current timestamp as ID, make sure that you use proper IDs like UUIDs instead if you plan to deploy this project. Then, we set an onResponse listener that calls the “streamOpenAIResponse” function, which triggers after a response from one the subsequent routes of the plugin reaches its destination. The called function sends a request to the LLM with the user’s message and streams back the LLM’s response directly to the frontend, thanks to the stream object that was created earlier.
This is because the processing of the POST /chat route consists of creating a Message object containing the user message, adding that message to the ongoing conversation, and finally sending back to the frontend an HTML fragment to be included in the DOM by HTMX, using JSX, and meant to contain the user message and the LLM Response. The user message is already included in the fragment, while the LLM response will be streamed into it once the fragment is received. Note that we made use of Elysia’s input validation by defining the shape of the data we’re expecting in the body of requests toward that route. Therefore, all requests not matching the shape will be dismissed.
We conclude the backend with the function that interacts with the LLM (we only present the function for OpenAI models for better readability):
TypeScript
async function streamOpenAIResponse(sseStream: Stream<string>, conv: Conversation, assistantMessageId: string): Promise<Message> {

    const openaiStream = await openai.chat.completions.create({

        model: 'gpt-3.5-turbo',

        messages: conv,

        stream: true,

    })

    let fullMessage = ''

    for await (const chunk of openaiStream) {

        const delta = chunk.choices[0]?.delta?.content || ''

        fullMessage += delta

        sseStream.event = assistantMessageId

        sseStream.send(fullMessage.replace(/(\r\n|\n|\r)/gm, "
"))

    }

    return { role: 'assistant', content: fullMessage }

}We send the conversation to the LLM, including the newly added user message, then await for Openai’s stream. Everytime we receive a chunk, we append it to what we’ve received so far, and send the result to the frontend. What will happen on the frontend is that the previous content (the llm’s answer without the last received piece), will be replaced by the full message so far.
As you noticed, before sending data, we set the stream event to the assistantMessageId. It is because, on the frontend, we will make HTML elements react to specific SSE events using HTMX. This way, we can stream the LLM’s answer to the right div in the DOM using the assistantMessageId as event name. Let’s start creating the frontend and everything will make sense.
Implementing the frontend
It is now time to replace the index.html file we created earlier with the actual chat interface. It is going to be very simple: a form with a textarea and a submit button, and above it a div that will display the message exchanges as they come, from top to bottom:
HTML
<body>

    <div>

        <div id="chat-history"

            sse-connect="/chat/stream" hx-on::after-settle="this.scrollTo(0, this.scrollHeight)">

        </div>

        <form id="chat-form" hx-post="/chat" hx-trigger="submit, keydown[!(ctrlKey||shiftKey)&&keyCode==13] from:#usermessage" hx-target="#chat-history" hx-swap="beforeend" hx-on::after-request="this.reset()" >

            <textarea id="usermessage" name="usermessage" placeholder="Type your message here" required

                _="on input set me.style.height to '' then set me.style.height to (me.scrollHeight + 'px') end"

               ></textarea>

            <button id="send-button" type="submit"></button>

        </form>

    </div>

</body>The chat-history div will contain the chat exchanges. To enable the streaming of the llm response, we define this div as the one opening the SSE stream with the HTMX attribute “sse-connect=”/chat/stream”. By doing so, we allow any HTML element inside chat-history to be a potential stream receiver. The after-settle attribute makes sure the div is scrolled down in case of an incoming message.
The chat form has multiple HTMX attributes, let’s see what they do:
- hx-post=”/chat”: sends a post request with its content as payload
- hx-trigger=”submit, keydown[!(ctrlKey||shiftKey)&&keyCode==13] from:#usermessage” : the post request is triggered by clicking on the submit button, or if a keydown event is emitted by the textarea, which involves the Enter key, but not the CTRL+Enter key combination. In other words, the user can send a message by clicking on the submit button or by pressing enter while writing in the textarea. It is still possible to write newlines using CTRL+Enter.
- hx-target=”#chat-history”: instead of swapping the form’s own content, the response to the request should be swapped with the #chat-history div’s content.
- hx-swap=”beforeend”: instead of replacing #chat-history’s content (the default behavior), received content should be appended.
- hx-on::after-request=”this.reset()”: we need to explicitly clear the textarea’s content since we are not replacing the form with new content, nor we are redirecting to a new page.
So, to sum up, when a user writes a message, s/he can make newlines with CTRL+Enter, and submit a message by clicking on the submit button or hitting Enter. This triggers a request to /chat, and the server’s response is inserted at the end of the #chat-history div.
As a bonus, we have introduced a bit of Hyperscript (a web scripting language meant to be paired with HTMX for situations where HTMX alone is not enough) in the textarea to resize it automatically with its content.
The last addition to complete the frontend logic is actually on the server, we need to adapt the server’s response to the /chat requests to enable SSE streaming:
TSX
return <>

<div>{body.usermessage}</div>

            <div id={llmMessageId} sse-swap={llmMessageId}></div>

</>The sse-swap attribute makes the div listen to SSE events, and when an event with name $userMessageId occurs, HTMX swaps the div’s content with the event’s data. This mechanism is how we make sure, chat exchange after chat exchange, that the LLM response is streamed into the right element!
You can start the Elysia server with the following command:
Applying CSS Styling
The backend and frontend logic is here, the app is functional, but the resulting interface looks terrible. Let’s install unocss and the presets we will be using:
Bash
bun add unocss @unocss/preset-icons @unocss/preset-web-fonts @iconify-json/material-symbolsWe can now create the unocss.config.ts file:
JSON
import { defineConfig, presetIcons, presetWebFonts, presetWind } from "unocss";

export default defineConfig({

  cli: {

    entry: {

      patterns: ["views/index.html", “src/index.tsx”],

      outFile: "public/style.css",

    },

  },

  presets: [presetWind(), presetIcons(), presetWebFonts({

provider: 'fontshare',

fonts: {

sans: 'satoshi'

}

})],

});We will be using Tailwind’s preset to style our interface. We will also use an icon to style the submit button, and we will use fontshare’s Satoshi as our font. Going back to the index.html file, let’s add utilities and have a decent interface:
HTML
<body class="flex justify-center items-center py-2 h-screen bg-gray-100">

    <div id="chat-container" class="w-full max-w-3xl flex flex-col font-sans h-5/6 mx-auto bg-white shadow-lg rounded-lg">

        <div id="chat-history" class="flex-1 overflow-y-auto flex flex-col space-y-2 p-4" hx-ext="sse" sse-connect="/chat/stream" hx-on::after-settle="this.scrollTo(0, this.scrollHeight)"></div>

        <form id="chat-form" hx-post="/chat" hx-trigger="submit, keydown[!(ctrlKey||shiftKey)&&keyCode==13] from:#usermessage" hx-target="#chat-history" hx-swap="beforeend" hx-on::after-request="this.reset()" class="flex items-center justify-between p-4 bg-gray-50">

            <textarea id="usermessage" name="usermessage" placeholder="Type your message here" required _="on input set me.style.height to '' then set me.style.height to (me.scrollHeight + 'px') end" class="flex-1 h-12 max-h-48 resize-none border rounded-md p-2 mr-2"></textarea>

             <button id="send-button" class="px-2 i-material-symbols-send w-9 h-9 py-2 h-12 bg-blue-500 hover:bg-blue-600" type="submit"></button>

        </form>

    </div>

</body>Similarly, let’s style the HTML fragment returned by the server:
TSX
return <>
<div class="bg-blue-100 rounded p-2 whitespace-pre-wrap"> {body.usermessage}</div>

            <div class="bg-green-100 rounded p-2 text-balance whitespace-pre-wrap" id="{{llmMessageId}}" sse-swap="{{llmMessageId}}"></div>
</>
We are not going to explain the effect of every utility we used, but this is what was achieved:
- Ensured that #chat-container takes the full height of the screen (minus some padding), roughly 800px wide, centered;
- The #chat-history div takes up all available vertical space, pushing the form at the bottom;
- The textarea and the submit button are on the same line;
- The submit button, with utility class i-material-symbol-send, is turned into an svg arrow;
- The user and llm message divs are light blue and green and take the entire width of #chat-container, minus some padding.
To generate the final CSS file, we run the command:
Bash
bunx –bun unoUno parses the files given the file pattern we created in the config, which only contains the index.html index.tsx files, to populate the public/style.css file with all the utility classes we used for our interface. Lastly, we import the style file in the header of the index.html, along with tailwind’s style reset:
Bash
<link rel="stylesheet" href="https://cdn.jsdelivr.net/npm/@unocss/reset/tailwind.min.css" />

<link rel="stylesheet" href="public/style.css">Final step, we need to add the static plugin to Elysia, so that it can serve static files from the public/ folder:
ShellSession
bun add @elysiajs/staticThen make the elysia app use the static plugin before the ones we created:
TypeScript
const app = new Elysia()

    .use(staticPlugin())

.use(chatPlugin)Now start the Elysia server:
ShellSession
bun dev
And voilà 🎉! If you’ve been following along, this is what you should see:
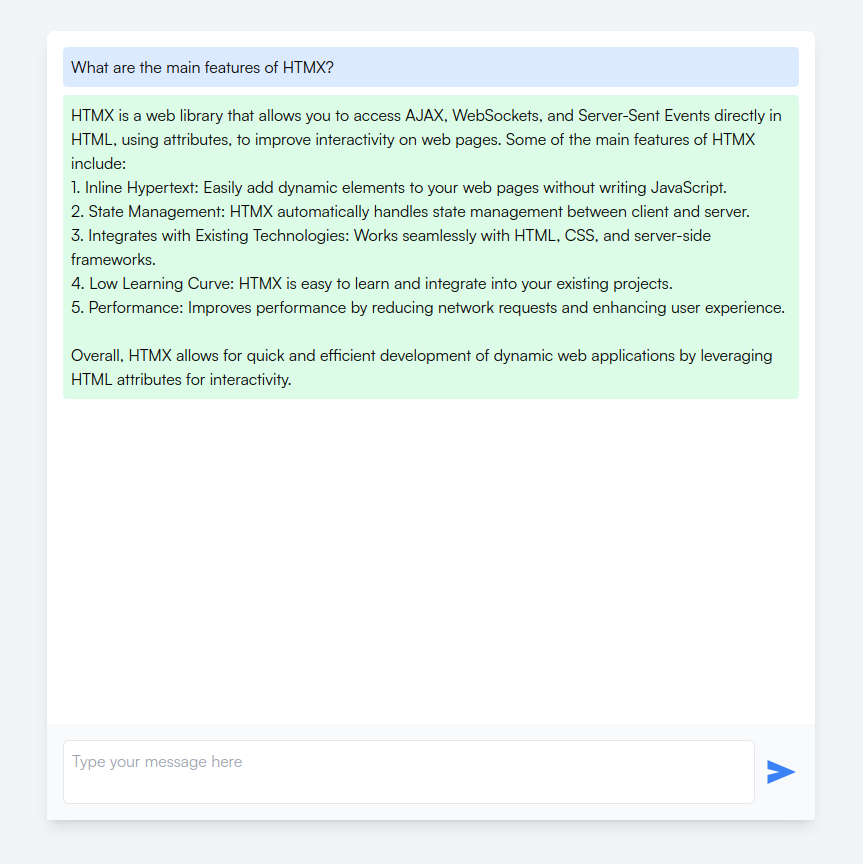
Conclusions
We now have a functional chat interface with OpenAI and its gpt3.5 model, where the LLM’s response is streamed to the browser “à la chatGPT”. Using HTMX for the front-end logic introduced an engaging challenge—forcing ourselves not to succumb to Javascript and instead finding the right HTMX attributes and properties to achieve our goals. However, it did feel a bit too forced at times, where some tasks could have been quickly accomplished with just a few lines of JavaScript. There is certainly a tradeoff to be found. Regardless, the evolution of HTMX within the web development sphere is something to watch with interest.
The chat application, in its current form, is limited to local use in a single browser tab due to the absence of session management. It also lacks data persistence, which would require integrating a database. And the application is limited to interactions with OpenAI models. However it constitutes a good starting point for anyone who works with LLMs and has to continuously evaluate their behavior.
Stay tuned!
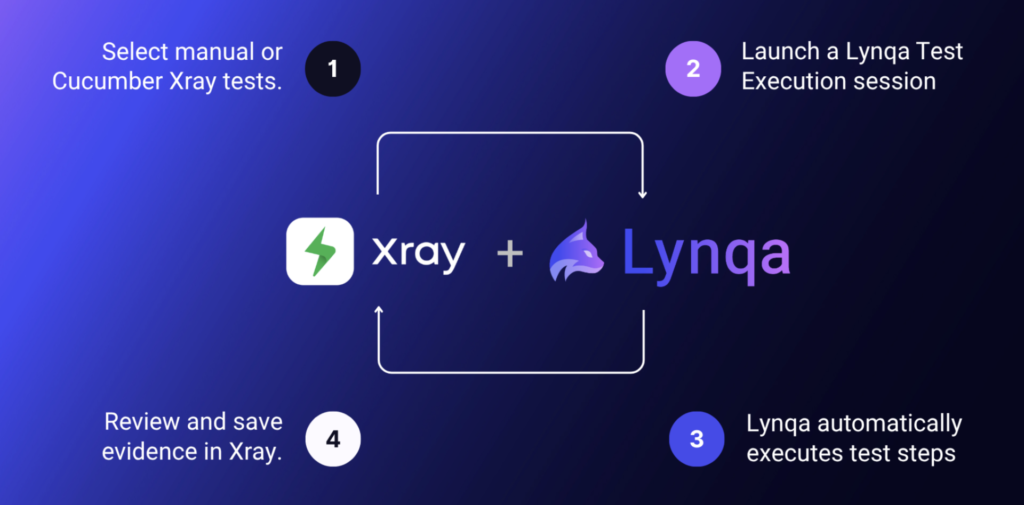
Agentic AI Test Execution inside Jira with Xray and Lynqa
AI Lynqa
AI is transforming every stage of software testing, from requirement analysis to how teams design test cases,…
Read the article
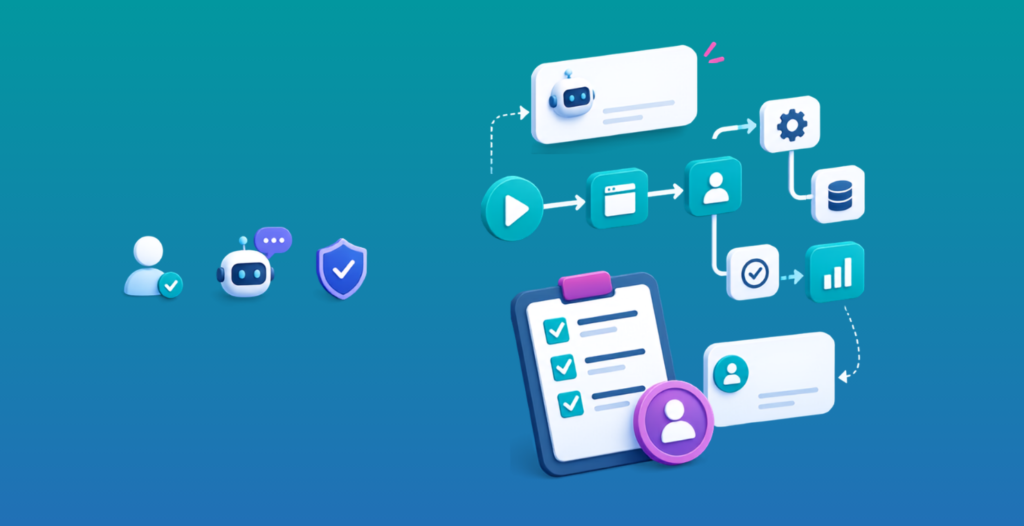
AI and E2E/Regression Testing: How to Maintain Business Control?
AI Testing Yest
Designing good tests requires a strong understanding of the business. This is why QA teams, among all…
Read the article
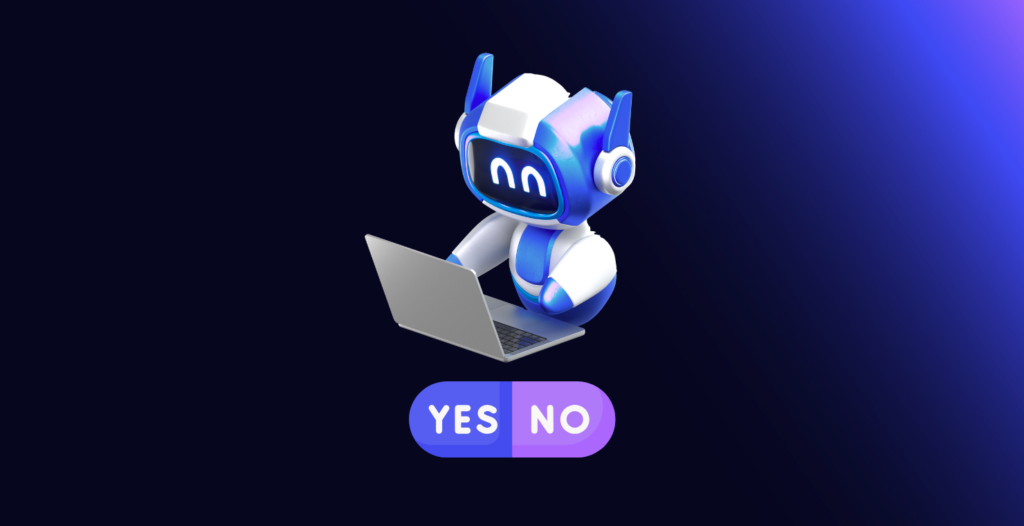
Can We Trust an AI Agent to Execute Tests?
AI Lynqa
The three pillars of trustworthy agentic AI test execution in Xray: measurable reliability, human control, and transparent…
Read the article